How to Register a New Patient Visit on AfyaWingu — Fast, Accurate, and Clinic-Ready
Welcome back to the AfyaWingu Healthcare Management System series!
In today’s guide, we’ll walk you through one of the most essential daily tasks in your clinic: registering a new patient visit—quickly, accurately, and without friction. Whether you’re managing walk-ins, scheduled appointments, or referrals, the “Register Visit” page is your command center for getting patients into the care pipeline.
Let’s dive in.
Step 1: Navigate to the “Register Visit” Page
Once logged in, head to the Registration section of your AfyaWingu dashboard. Select “Visits” > “Register” from the submenu.
At the top-right of your screen, you’ll see a breadcrumb trail:
Registration > Visits > Register
This helps you stay oriented within the system—especially during busy clinic hours.
On the left, your main navigation menu remains accessible so you can jump to the Visit Queue, Triage Queue, or other modules anytime. But for now, let’s focus on creating a new visit.
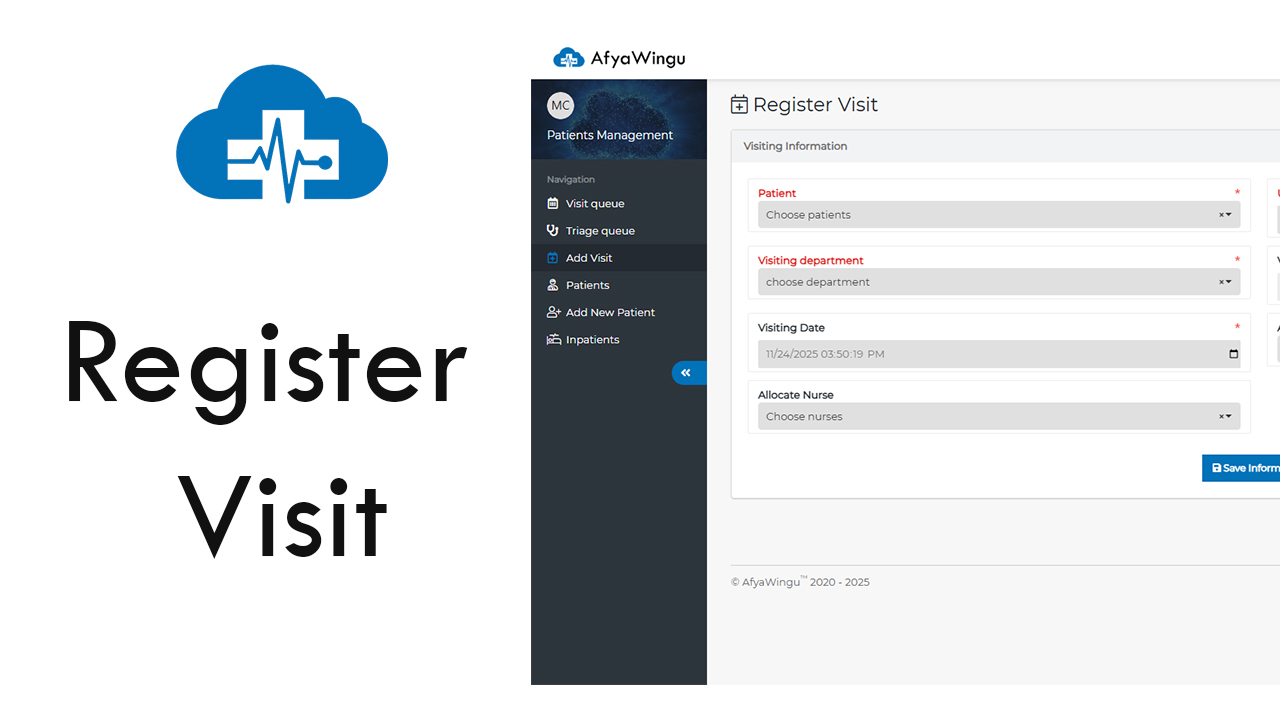
Step 2: Fill Out the “Visiting Information” Form
The core of this page is the “Visiting Information” form—designed to capture everything your team needs to initiate care.
🔹 Patient Selection (Required)
Start by clicking the Patient dropdown to select an existing patient from your database.
💡 New patient? No problem! First, register them via “Add New Patient” in the navigation menu, then return here to log their visit.
🔹 Visiting Department (Required)
Choose the department the patient is visiting— Dental, Imaging, Triage, OPD, or any other service you’ve configured. This ensures the right team is alerted and prepared.
🔹 Visiting Date & Time
The system auto-fills this with the current date and time (e.g., November 24, 2025, at 3:50:19 PM).
Need to schedule for later? Click the calendar icon to adjust the date or time as needed.
🔹 Allocate Nurse
Assign a nurse to the visit using the dropdown. This is especially useful for clinics that begin with triage or preliminary assessment.
Step 3: Complete Additional Visit Details (Right Panel)
On the right side of the form, you’ll find key fields that enhance workflow and prioritization:
Urgency Level:
Defaults to “Normal”, but you can change it to “Medium” or “Urgent” based on clinical need. This helps your team prioritize critical cases in real time.
Visiting Number:
Automatically generated (e.g., VN-11/2025/24/4). This unique ID includes the month, year, day, and sequence number—perfect for tracking, reporting, and audit trails. No editing needed!
Allocate Doctor:
If you already know which clinician will see the patient, assign them now using the dropdown. This streamlines scheduling and reduces handoff delays.
⚠️ Remember: Fields marked with a red asterisk (*) are required. You won’t be able to save without completing them.
Step 4: Save and Activate the Visit
Once all required details are in place, click the big blue “Save Information” button at the bottom of the form.
✅ Done!
The system instantly:
- Logs the visit
- Generates a unique visiting number
- Adds the patient to “Today’s Visit Queue”
- Notifies relevant staff (based on your clinic’s workflow settings)
From here, nurses, doctors, and front-desk staff can see the patient is ready— ensuring no delays, no mix-ups, and no missed care.
Why This Matters
Every visit you register on AfyaWingu isn’t just data—it’s a patient’s entry point into your care system. Accurate, timely registration means:
- Faster triage and consultation
- Better resource allocation
- Reduced administrative errors
- Full compliance with clinical documentation standards
With AfyaWingu, you’re not just managing visits—you’re delivering coordinated, patient-centered care from minute one.
Thank you for using AfyaWingu—your trusted partner in digital health across Africa.
We’re here to make every visit count.